

A 2-inch suspension lift doesn’t automatically mean you need extended brake lines. Whether you need extended brake lines for a 2-inch lift depends on how far the suspension travels and whether the factory hoses retain slack as the wheels move and the steering turns. A hose that pulls tight at full droop needs attention before the vehicle is driven.
It’s easy to assume lift height alone determines the answer, but shock length and suspension movement matter too. This guide explains how lift type, suspension travel, steering movement and hose routing affect brake-line fit. You’ll learn what to look for around the tyres and suspension, why full droop matters, and how the requirements can differ between a small spacer lift and a suspension setup with more travel.
Key Takeaways
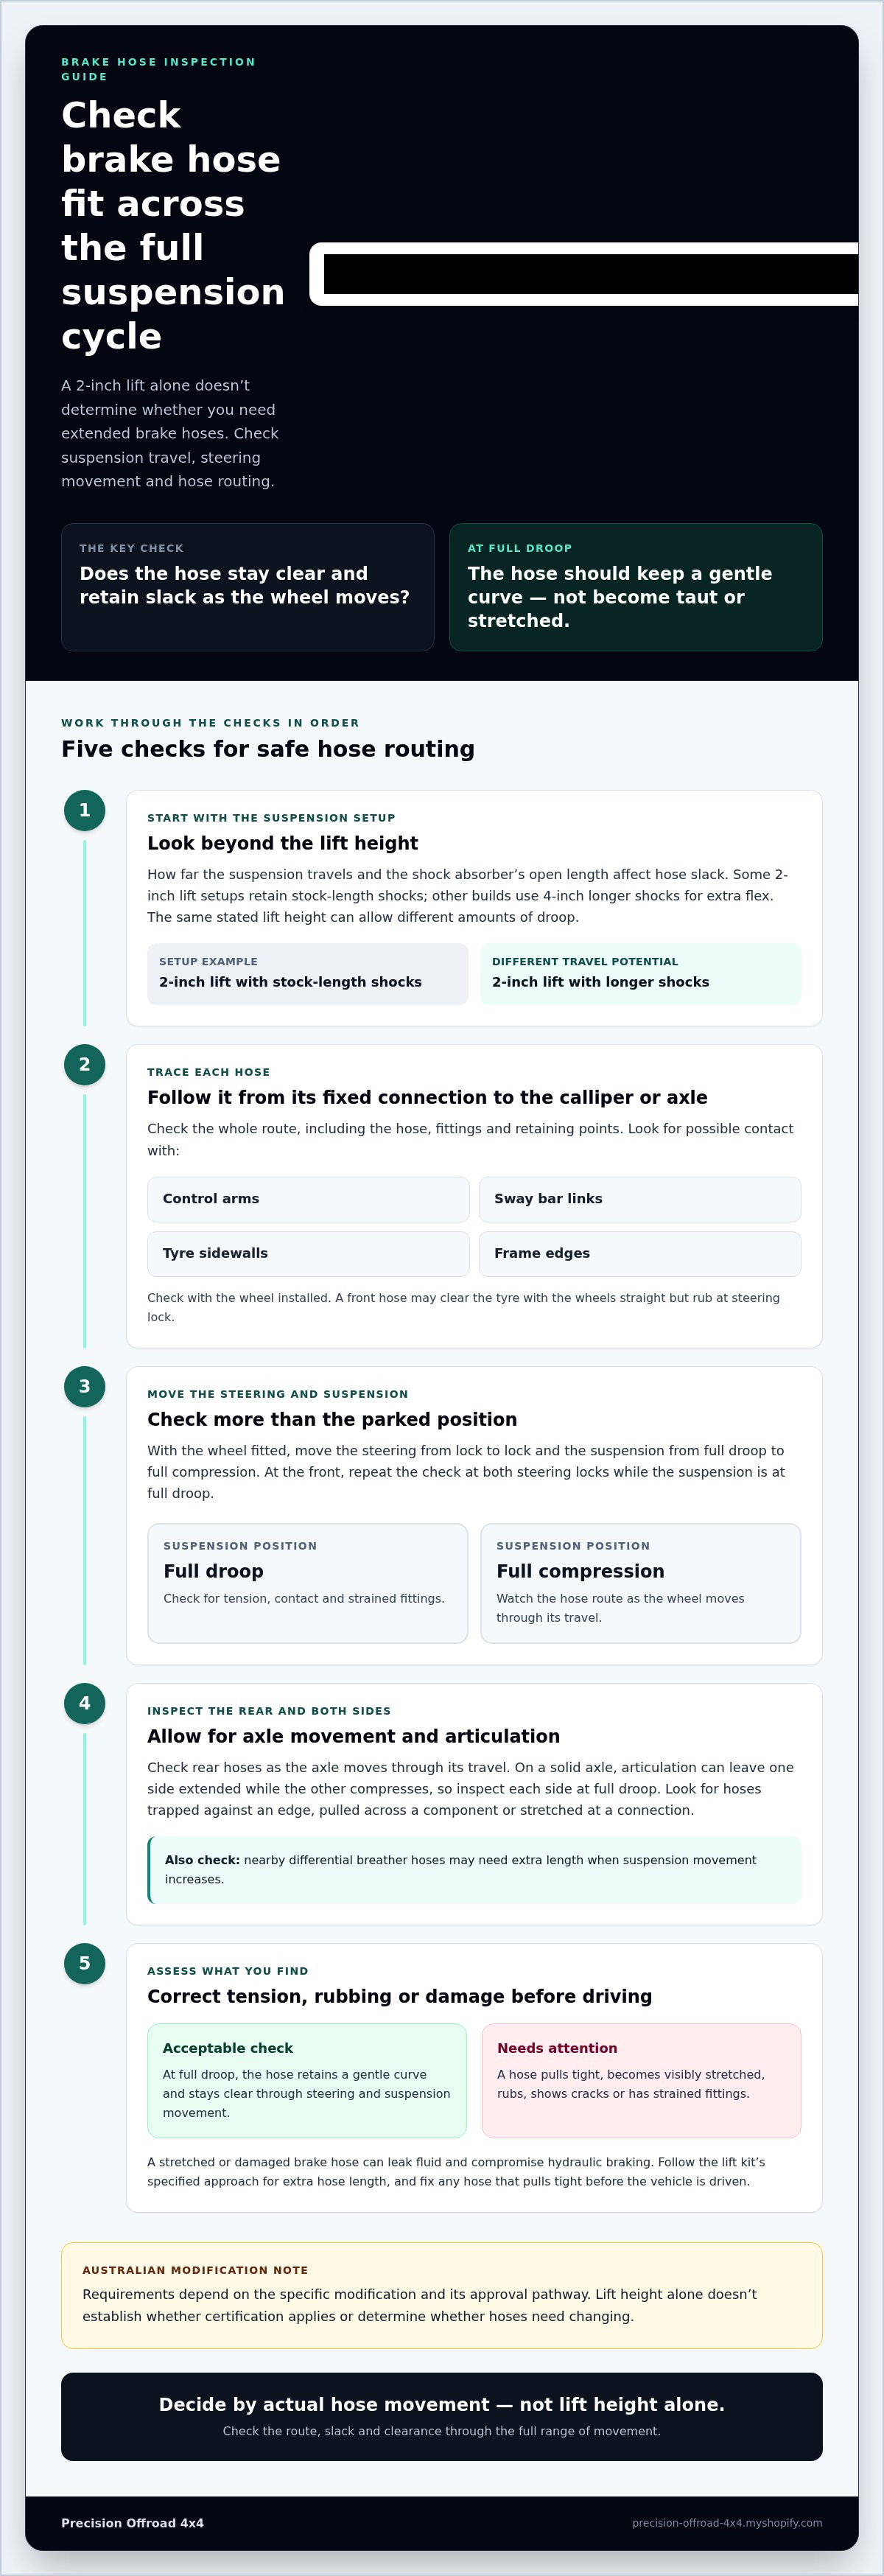
- A 2-inch lift doesn’t automatically require longer brake hoses. Suspension travel and shock length matter more than lift height alone.
- Check hose clearance around control arms, sway bar links, tyres and frame edges as the suspension and steering move.
- At full suspension droop, hoses should retain a gentle curve rather than becoming taut or stretched.
- Spacer and levelling lifts may leave the factory hoses suitable, but the fit still depends on the vehicle’s actual movement and routing.
- Use the lift kit’s specified approach for extra hose length, and fix any hose that pulls tight before driving.
Brake hose routing and clearance from suspension and tyres
A 2-inch lift doesn’t automatically require longer brake hoses. Hose routing and clearance through steering movement and suspension travel show whether the factory hoses still fit safely.
Brake Hose Routing
Brake hose routing is the path each flexible hose follows between the vehicle’s body, brake components and moving suspension. The hose needs a clear path as the wheel turns and the suspension moves. A hose that sits correctly at normal ride height can still touch a control arm or tyre in another position.
Trace each hose visually from its fixed connection to the calliper or axle. Look for contact with control arms, sway bar links, tyre sidewalls and frame edges. For example, a front hose may clear the tyre with the wheels straight, then rub the sidewall at steering lock. Check the route with the wheel installed.
Check the Full Movement Range
After replacing a brake hose, check its route with the wheel fitted, the steering turned from lock to lock, and the suspension moved from full droop to full compression. These positions can reveal contact or tension that a stationary inspection misses. At the front, repeat the check at both steering locks while the suspension is at full droop.
Follow the hose as the wheel moves rather than judging clearance from one angle. Watch the fittings and retaining points as well as the hose itself. If the route shifts towards a sway bar link or frame edge, check whether the hose twists, rubs or catches. The route must remain clear throughout the movement.
Check Tyre and Suspension Clearance
Tyre sidewalls and suspension parts can move close together during steering and articulation. Turn the steering fully left and right, then inspect the gap between each front tyre and its brake hose. Check both sides because hose routing can differ. Include the control arms and sway bar links in the inspection, especially near bends and mounting points.
At the rear, inspect the hoses as the axle moves through its travel. A lift can change the hose’s position relative to the axle and frame. Look for a hose trapped against an edge, pulled across a component or stretched at a connection. Contact marks or scuffing show where the route needs attention.
Risks of Stretched or Damaged Brake Lines
A stretched or damaged brake hose can leak fluid and compromise hydraulic braking. A hose that becomes tight at suspension droop must be fixed before the vehicle is driven again. Abrasion against a tyre, control arm or frame edge can also damage the hose as the suspension cycles.
If you’re asking whether you need extended brake lines for a 2-inch lift, inspect hose slack and routing at full travel rather than relying on lift height alone. At full droop, each hose should retain a gentle curve, not become straight, taut or visibly stretched. Check for cracks, rubbing and strained fittings, then correct the route or hose length before driving.
Brake line needs for full suspension lifts and solid-axle vehicles
A full suspension lift changes how far the wheels can move from their static ride height. Spring lift height alone doesn’t show whether the factory brake hoses can accommodate that movement.
Brake Lines on Full Suspension Lifts
A full suspension lift raises the vehicle by changing suspension components, and its effect on brake hoses depends on usable suspension travel. Longer shocks can increase axle droop beyond the slack available in factory hoses. The hose must follow the wheel without pulling tight or straining its fittings.
Some 2-inch lift setups retain stock-length shocks, while other builds use 4-inch longer shocks for extra flex. The second setup can extend the suspension farther, even though both vehicles have the same stated lift height. Follow the lift kit’s instructions, then assess hose movement at the shocks’ full open length.
Australian requirements depend on the specific modification and its approval pathway. Lift height alone doesn’t establish whether certification applies or determine whether hoses need changing. Keep the hose installation and operation safe, and establish the applicable approval requirements for the vehicle’s modification.
Brake Lines on Solid-Axle Vehicles
A solid axle connects the wheels across one axle, so articulation can move the axle substantially relative to the body. Brake hoses linking the body and axle need enough length for that movement. This is especially relevant when longer-travel shocks allow the axle to droop farther than the original suspension.
Inspect each hose at full droop on both sides. The axle can articulate unevenly, leaving one side extended while the other compresses. Also consider nearby differential breather hoses, which may need extra length when suspension movement increases. A longer shock does not automatically suit the existing springs or hoses.
Vehicle Models Needing Extended Brake Lines
No model name alone determines the answer to whether a 2-inch lift needs extended hoses. The deciding factors include the suspension layout, shock open length, axle articulation and hose routing. Two vehicles of the same model can have different hose requirements if their lift components and available travel differ.
Reported examples illustrate that variation. Some Nissan Patrol owners used factory hoses with a 2-inch lift, while one Toyota 100 Series owner reported running a 3-inch Touflex lift without extended lines. These are individual setups, not a fitment rule for every Patrol or 100 Series.
Compare the suspension kit’s instructions with the actual hose movement on your vehicle. A setup with longer shocks can use more droop than one with stock-length shocks. If you’re selecting a lift, compare suspension lift kit options against your vehicle’s intended travel and configuration.
Brake line needs for levelling kits and spacer lifts
A levelling kit or spacer lift raises part of the vehicle, but the effect on hose length depends on suspension movement. With a small lift, the factory hoses may retain enough length, but inspect the actual vehicle throughout its suspension travel.
A spacer changes the suspension’s position at rest. It doesn’t automatically add extra droop, so lift height alone can’t tell you whether the original hoses remain suitable. The deciding factor is how far the suspension can extend after fitting the spacer, including any change to shock length. A spacer paired with longer-travel shocks can use more hose length than the spacer alone suggests.
For a levelling kit that raises the front, assess the front hoses separately from the rear. Turn the steering from lock to lock and inspect each front hose through the suspension’s movement. A Patrol owner with a 2-inch lift reported adequate rear hose length, but a marginal front hose that pulled tight on a hoist. That example shows why one axle’s fit doesn’t establish the other axle’s clearance.
Rear spacers need a separate assessment too. A Tacoma owner reported that the rear service brake hoses remained adequate with the suspension extension in their setup. That observation applies to that vehicle and arrangement, not every Tacoma or spacer kit. Check the hose with the axle at full droop, then look for tension, twisting or contact along its route.
A body lift differs from a suspension spacer. It raises the body without changing suspension travel, so longer brake hoses generally aren’t required for that change alone. Don’t apply that reasoning to a suspension lift, where the axle or wheel can move farther relative to the body. Identify the type of lift fitted before assessing hose length.
For a spacer or levelling kit, use this sequence to judge the fit:
- Identify whether the kit changes body height, suspension position or shock travel.
- Check the kit instructions for any hose or hard-line routing requirements.
- Inspect each axle independently at full droop, including steering movement at the front.
- Look for a taut hose, strained fitting, twist or contact with a tyre or suspension component.
Some small spacer lifts and levelling kits don’t require longer hoses, but that isn’t a blanket fitment rule. If any hose becomes tight at full extension, correct its length or routing before driving. The vehicle’s actual suspension movement, rather than the kit’s label, determines whether the factory hose has enough slack.
Extended brake lines versus hard-line tab relocation
Lift instructions specify whether a vehicle needs longer flexible brake hoses or relocated hard-line tabs. Either approach must preserve a secure route without kinks or tension throughout suspension movement.
Extended Brake Lines
An extended brake line is a longer flexible hose that connects the vehicle’s brake components while allowing suspension movement. It can provide extra length when the original hose becomes taut at full droop. The replacement must suit the vehicle and its fittings, and follow a route clear of tyres and suspension parts.
Hard-line tab relocation is another option when the original arrangement limits hose movement. A Tacoma owner reported bending lower brake-line tabs to gain 2-3 inches of line, while warning that the hose must not kink at full extension. That example isn’t a universal method. Follow the lift kit instructions to determine whether extended hoses or relocation brackets are specified.
Don’t choose between the options by lift height alone. A longer hose can still rub or twist if routed poorly. A relocated tab can also leave the hose strained if the suspension extends beyond its available slack. Check the finished route throughout suspension travel, including at fittings and mounting points.
Safe Installation and Bleeding
Installing and bleeding extended brake lines involves fitting compatible hoses, securing their connections, then removing air from the hydraulic system. Correct installation matters because a leak, trapped air or poorly routed hose can compromise braking. Follow the vehicle’s service procedure and the hose and lift-kit instructions for the specific configuration.
After fitting a hose, check that its connections are secure and its route is free from twisting, kinks and contact. Move the suspension through its travel and turn the front steering from lock to lock. Confirm the hose remains clear and retains slack at full droop. Then bleed the system using the vehicle-specific sequence and specified brake fluid.
During bleeding, keep the reservoir supplied with the correct fluid. Air entering the system can leave the pedal soft, so a brief pedal check doesn’t prove the system is fully bled. Inspect each connection for leaks, then assess pedal firmness using the vehicle’s service procedure. Recheck the hose route after installing the wheel.
Before driving, confirm the brake pedal feels firm and connections remain dry. If the pedal is soft, fluid is leaking or a hose pulls tight, the vehicle isn’t ready for the road. Correct the fault and repeat the inspection. A tab adjustment must never kink a hose, and an extended hose must not hang against a tyre or suspension component.
How much brake hose slack is needed at full suspension droop?
There’s no single slack measurement that suits every lifted 4x4. At full suspension droop, the hose should keep a gentle curve, without becoming straight, taut or visibly stretched. That shape gives you a practical fit check across different hose routes and suspension layouts.
Assess the vehicle with its suspension unloaded at full droop. The axle or wheel hangs at its furthest extension, revealing whether the hose has enough length for that position. A hose that looks loose at ride height may become tight as the suspension extends. The shock absorber’s open length affects how far the suspension can droop, so inspect the finished setup instead of judging by lift height alone.
At the front, check the hose at full droop with the steering turned from lock to lock. Turning the wheels changes the hose’s route and can use up slack on one side. Keep the wheel installed during the inspection, then watch the hose as you steer left and right. Check that it doesn’t twist, pull against a fitting or touch the tyre.
Solid-axle vehicles need a check on both sides. During articulation, one side can droop while the other compresses, changing the angle and tension of each hose. Inspect the connection between the body and axle, including any retaining clips or brackets that guide the hose. The hose should move with the axle without catching on surrounding components.
Look at the hose’s shape and contact points, not just its apparent length. At full droop, a gentle curve indicates usable slack. A straight hose, strained fitting or visible stretch means the available length is being used up. Also check for contact with the control arm, sway bar link, tyre sidewall or frame edge as the wheels and suspension move.
Use a hoist or suitable workshop equipment to inspect full droop safely. Don’t get beneath a vehicle supported only by a jack. If a hose pulls tight at droop, correct the routing or fit a suitable longer hose before driving. Recheck after the change, including steering lock to lock at the front, because a correction in one position can affect clearance elsewhere.
When choosing suspension components, compare their travel characteristics with the brake hose routing on your vehicle. Explore suspension kit options as part of planning a lift, then assess hose slack at full droop before the vehicle returns to road use.
Keep the inspection consistent: assess brake hoses with the suspension unloaded at full droop, rather than relying on a view at ride height.
Precision Offroad 4x4: Wheel Upgrades
Precision Offroad 4x4 is a Perth-based specialist offering wheel upgrades and Dobinsons suspension kits. These options can help you plan suspension and wheel choices around your vehicle and intended use.
For a local starting point, consider the components you’re changing together and the fitment requirements for your 4x4. Precision Offroad 4x4 also offers Maxxis tyres for builds where tyre selection is part of the upgrade plan.
To discuss your 4x4 upgrade options, contact Precision Offroad 4x4 or visit precision-offroad-4x4.myshopify.com.
Make brake hose fitment part of your build plan
If you’re still weighing whether you need extended brake lines for a 2-inch lift, use the completed vehicle’s suspension travel and hose routing to guide that decision. Treat brake hose fitment as part of the build’s final sign-off, not an afterthought once the vehicle is ready for a trip. For those preparing a rig for remote touring or camping with dogs, having reliable pet identification sorted via petidtags.com.au is just as essential as running through your mechanical checklist. Record any routing changes so you can inspect the same areas after future suspension adjustments.
This approach is useful when you change shock length, alter mounting positions or revise the vehicle’s setup. A new configuration can change how the hose sits, even if ride height stays similar. Include brake-system condition in regular vehicle checks, especially after work that affects suspension movement.
For a considered next step with your 4x4 build, contact Precision Offroad 4x4. Plan the setup carefully, complete the fitment checks, and enjoy taking your vehicle out with confidence.
Frequently Asked Questions
Does a 2-inch suspension lift require extended brake lines?
Not automatically. Check the lift kit’s vehicle-specific fitting instructions for the spring and shock combination being installed. They identify whether hose extension or relocation hardware is part of that setup. If your vehicle’s suspension components differ from the kit configuration, don’t assume the same parts or installation method apply. Resolve compatibility before completing the lift, rather than treating the advertised height as a complete fitment specification.
How to check brake line clearance and tension after a suspension lift?
Inspect the hose’s outer cover and fittings for cracking, bulges, corrosion or wetness, which can indicate damage or a leak. Compare both sides for unusual differences in hose position or condition. A clean-looking hose still needs a functional assessment, so include brake operation in post-installation checks. If you find damage or fluid leakage, don’t drive until the fault has been addressed.
Are extended brake lines or relocation brackets better for a 2-inch lift?
Use the method specified for your vehicle and lift-kit configuration. A relocation bracket changes the hard-line mounting position, so the rigid pipe must remain free from bending strain. An extended hose needs fittings that match the vehicle’s brake connections and must sit without twisting. Don’t select either option by appearance or treat them as interchangeable. The correct installation depends on the kit’s intended hardware and routing.
How much do extended brake lines cost in Australia?
At Precision Offroad 4x4, extended brake line kits generally range from $150 to $400 depending on the vehicle make and model, whether you need braided stainless steel lines, and if additional relocation brackets or hardware are included in the setup.