

A full wall kit is useful only when it matches your awning’s footprint and layout. For an Outback Tourer 270 Plus, the full wall kit is made from 320GSM canvas; other outback tourer accessories should suit how you mount, open and pack away the awning. Fit matters more than adding pieces you won’t use.
You want practical shelter and gear that holds up on real trips, not accessories that add setup time or get left behind. Choosing the right outback tourer accessories starts with your awning model, vehicle mounting arrangement and the conditions you expect to encounter.
This guide explains which awning add-ons may suit your setup and how to check fit, access, pack-down and durability for Australian conditions. You’ll also learn what to consider about wind, dust and rain before relying on the setup on a trip.
Key Takeaways
- Choose awning walls and add-ons to match your exact awning layout, mounting arrangement and how you use the shelter.
- Before fitting vehicle accessories, consider how the changes may affect warranty, insurance and safety compliance.
- Test the setup in realistic Australian conditions, including deployment, access, pack-down and exposure to wind, dust and rain.
- The Outback Tourer mounting kit uses six heavy-duty steel L brackets for flush mounting rooftop tents to Uni Strut systems; tent fasteners are included, but Uni Strut fasteners are not.
- Check that rooftop tent storage and mounting arrangements suit your vehicle and the way you prepare for trips.
Do Outback accessories affect warranty, insurance or vehicle safety compliance in Australia?
They can affect how a claim or safety concern is assessed, but the result depends on the accessory, installation and circumstances. An awning wall attached to an Outback Tourer 270 Plus, for example, is different from a rooftop tent mounted to a vehicle. The first step is to identify what the accessory connects to, how it changes the vehicle’s use, and which warranty or insurance terms apply.
Outback Tourer products have a warranty period of one to two years. Read the product warranty for its coverage, exclusions and claim process before fitting accessories. Keep the purchase record, instructions and installation documents together. If a fault appears, describe what happened and which component is affected. A failed awning fastener, for instance, is different from damage to a vehicle roof or mounting point.
Vehicle warranty questions depend on the relationship between a modification and the fault being assessed. Don’t assume that fitting one accessory cancels every part of a vehicle warranty, or that the warranty covers damage caused by an incompatible fitting or installation. Keep original vehicle records, photograph mounting points before work, and retain receipts and product instructions. These details help establish what changed and when.
Insurance is a separate consideration. Before fitting an accessory, read your policy terms and contact your insurer about the specific change. Describe the item, its mounting method and how you’ll use it. Ask for the response in writing and keep it with your vehicle records. For example, explain whether a rooftop tent will stay fitted during ordinary driving or be mounted only for trips. This gives the insurer a clear description to assess against the policy.
For safety and compliance, assess the complete vehicle setup, not just the accessory. A rooftop tent and its mounting hardware add equipment above the roof, while a deployed awning changes the vehicle’s external setup. Check the vehicle maker’s instructions, the accessory instructions and the mounting system’s suitability. Don’t drill, clamp or alter a mounting point based on appearance alone. If installation changes the vehicle structure or creates an unsafe condition, stop and have the arrangement assessed before driving.
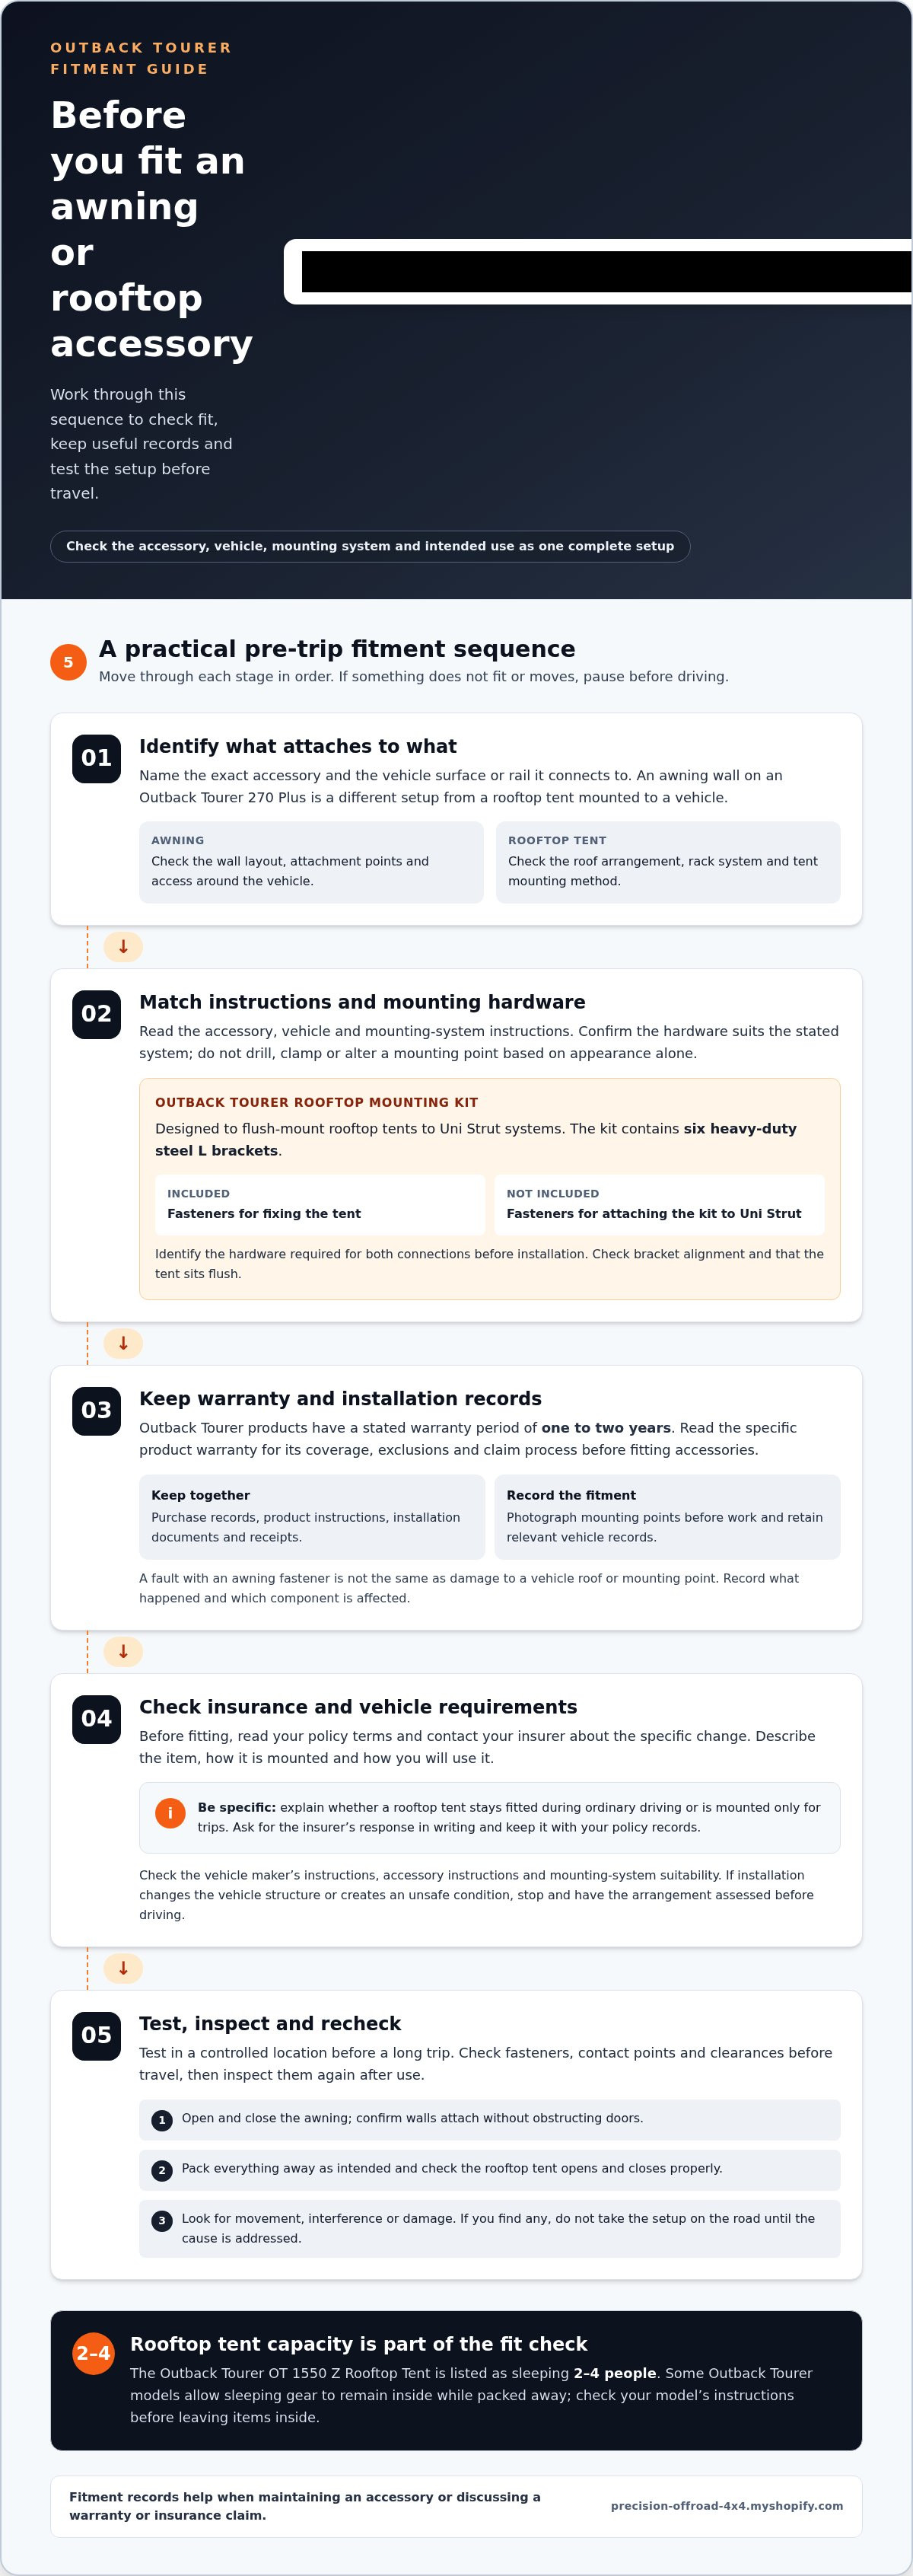
Use this sequence before fitting or relying on the equipment:
- Identify the exact Outback Tourer accessory and the vehicle surface or rail it attaches to.
- Read the product and vehicle instructions, then match the mounting hardware to the stated system.
- Record the installation with photographs, receipts and any relevant warranty documents.
- Describe the change to your insurer and retain its written response with your policy records.
- After fitting, inspect fasteners, contact points and clearances before travel, then recheck them after use.
Mounting details matter. The Outback Tourer mounting kit is designed to flush-mount rooftop tents to Uni Strut systems and contains six heavy-duty steel L brackets. Fasteners for fixing the tent are included, but fasteners for attaching the kit to Uni Strut are not. Confirm that the complete arrangement suits your vehicle and rack before installation. A mismatch between the tent, brackets and roof system can compromise fit and cause avoidable movement.
Test the setup in a controlled location before a long trip. Open and close the awning, check that walls attach without obstructing doors, and pack everything away as intended. Inspect the fitted hardware again after testing. If you notice movement, interference or damage, don’t take the setup on the road until you address the cause. A written record of the fitment and inspection is useful when maintaining the accessory or discussing a warranty or insurance claim.
Read the relevant instructions in full and check that the proposed setup meets their stated limits and fitting requirements. If anything is unclear, pause before installation and seek clarification from the relevant supplier, installer or vehicle maker. Keep a record of the advice and final configuration, including any changes made after fitting. The website states that its use and any disputes arising from it are subject to Australian law. This concerns website use and related disputes; it does not, by itself, determine how a particular warranty, insurance claim or vehicle setup will be treated. Assess those matters against the applicable product documents, policy terms and vehicle instructions.
Tourer rooftop
Choose a rooftop setup by matching the tent, mounting system and vehicle roof arrangement. The Outback Tourer OT 1550 Z Rooftop Tent is listed as sleeping 2-4 people, so consider who will use it and how much room you need. Some Outback Tourer rooftop tent models allow sleeping gear to stay inside while packed away. That can simplify camp setup, but check your model’s instructions before leaving items inside.
The mounting method needs equal attention. The Outback Tourer mounting kit is designed for flush mounting rooftop tents to Uni Strut systems. It contains six heavy-duty steel L brackets, and the Outback Tourer mounting brackets are made from 4mm stainless steel. Match the bracket arrangement to your Uni Strut layout, then inspect how the tent sits before tightening the installation.
Check the fasteners for the two separate connections. Fasteners for fixing the tent are included with the Outback Tourer mounting kit. Fasteners for attaching the kit to Uni Strut are not included. Identify the hardware needed for both connections before starting. Don’t assume the tent fasteners also secure the brackets to the vehicle’s rack system.
Check the fit deliberately rather than relying on appearance. Position the tent on the roof system, confirm the brackets align with the Uni Strut, and make sure the tent sits flush. Before travelling, inspect each connection and confirm the tent opens and closes as intended. If a bracket doesn’t align or the tent shifts during handling, stop and correct the fit before packing for a trip.
Canvas is another selection factor. The Outback Tourer 360 X-TEND is made from 280GSM canvas. Compare that stated material with your intended use and the way you’ll store and maintain the tent. During a practical test, open and close the tent, check the fabric and access points, then pack it away using the supplied product instructions. This gives you a chance to identify awkward steps before arriving at camp.
Test your rooftop arrangement in stages:
- Confirm the tent model and check its sleeping capacity, such as the OT 1550 Z’s listed capacity of 2-4 people.
- Lay out the six L brackets and identify the separate fasteners required for tent-to-bracket and bracket-to-Uni Strut connections.
- Fit the tent flush to the Uni Strut system, then check alignment and movement before loading gear.
- Practise opening and packing the tent, including any storage procedure allowed by your model’s instructions.
- Inspect the tent, brackets and fabric after the test, and note any contact, movement or difficult access.
For a Perth trip, practise the complete setup at home before heading onto dusty tracks or camping near the coast. Check the mounting connections again after your first outing, particularly if you’ve driven over corrugations. A simple record of the fitment and any maintenance helps you track changes over time. Compare Outback Tourer accessory options against your tent model and mounting arrangement before deciding what to add.
Before choosing a mounting option, distinguish the item name from the kit description and verify that the part you intend to buy matches the arrangement already checked on the vehicle. The Outback Tourer mounting kit contains 6 heavy-duty steel L brackets. Keep those details visible while comparing your planned fitment with the product information; do not assume a stated bracket set covers every separate fixing requirement. The tent-to-bracket and bracket-to-Uni Strut connections remain separate checks, so identify what is supplied for each before beginning.
Use the quoted price as a budget reference, not as a substitute for confirming the item’s contents and compatibility. Keep the bracket layout, tent position and required fasteners in view when reviewing the purchase details, and resolve uncertainties before installation. Once the hardware arrives, compare it with your planned arrangement and pause if a component or connection doesn’t match your expectations. This keeps your choice tied to the actual roof setup, not just the bracket count or price. A careful review before fitting helps avoid treating a matching description as proof that every installation detail is covered.
Precision Offroad 4x4: Wheel Upgrades
Precision Offroad 4x4 can help you match wheel upgrades to your vehicle and touring setup. Consider wheel dimensions, tyre choice and available wheel-arch clearance together. A wheel and tyre combination that suits your driving needs must also fit the vehicle without interference.
If your build includes suspension changes, assess the complete setup rather than choosing wheels in isolation. Precision Offroad 4x4 offers Wheel Upgrades, Dobinsons Suspension Kits and Maxxis Tyres. These options are relevant when you’re planning a coordinated change or replacing components for touring use. Bring your vehicle details and intended setup into the decision, including how you’ll use the vehicle on and off sealed roads.
For practical guidance on matching wheels and related upgrades, contact Precision Offroad 4x4 or visit precision-offroad-4x4.myshopify.com.
Plan your next touring setup
Build your touring setup around the way you travel, not a growing pile of gear. Before adding outback tourer accessories, list what you need at camp, how the vehicle is loaded and which parts of the setup must work together. Alongside your shelter and hardware, consider everyday touring safeguards such as Curb Samaritan, which uses QR-code stickers so fellow campers or passersby can send anonymous text alerts if they spot an issue with your parked vehicle. This gives you a clear basis for choosing practical additions and spotting compatibility issues before your next trip.
For vehicle upgrades beyond camp gear, Precision Offroad 4x4 offers Wheel Upgrades, Dobinsons Suspension Kits and Fulcrum Suspension Kits. These options can help you plan related changes as one considered vehicle setup, rather than treating each component as a separate decision.
Take the next step at your own pace. Review the available accessories, compare them with your setup and choose what answers a real need on the road or at camp. Explore Outback Tourer accessories and get your touring setup ready for the trips ahead.
Frequently Asked Questions
What accessories are available for the Subaru Outback in Australia?
For a Subaru Outback, match any upgrade to the vehicle’s model year, trim and existing setup. Check the owner’s manual and the accessory maker’s fitment details before choosing parts. Record your current wheel and tyre specifications, along with existing modifications, so you can compare compatibility accurately. “Outback Tourer” refers to a separate accessory range, so don’t assume every item with “Outback” in its name suits a Subaru.
Which Outback accessories are useful for touring, camping and off-road trips?
Prioritise equipment that meets a need on your planned route. For a remote trip, organise recovery gear, first-aid supplies, water and tools so each item is secure and accessible. Maintaining communication in isolated regions is just as vital, with equipment from Telco Antennas helping to boost mobile connectivity on regional tracks. Keep heavier cargo low and restrained to limit movement when braking or cornering. Before departure, load the vehicle as you’ll travel and check that passengers can reach essential equipment without unloading other cargo.
Where can Australians buy and have Outback accessories installed?
Perth buyers can purchase selected 4x4 upgrades through Precision Offroad 4x4. The business provides retail supply; this does not establish that it installs accessories. For fitting, use the product’s installation instructions and arrange work with a qualified installer suited to the vehicle and component. Give the installer the vehicle details, accessory specifications and any existing modifications so they can assess the intended fitment.